I didn’t want to keep my laptop or the computer switched on 24/7 to download torrents. So downloading my torrents was the first task I wanted my Raspberry Pi to do. The torrents will be downloaded to an external hard disk or a pen drive. Transmission provides a web UI which makes it easier to remotely add and monitor downloads. As for initial preparations, the RPi has a static IP and SSH was enabled. You might want to look at my previous post on initial setting up stuff.
Preparing and Mounting the External Storage
I used one of my pen drives that is formatted as an NTFS file system. Connect the external storage to the RPi. Open a SSH session and type:
$ sudo fdisk –l
This lists all the hard drives that are connected and you will be able to find your external storage.
Note the ‘Device Boot’ record (Mine is ‘/dev/sda1′ ).
Now let’s mound the drive. All mounted drives are accessed though /media/ folder.
$ cd /media/
$ sudo mkdir downloads
$ sudo mount –t ntfs-3g /dev/sda1 /media/downloads
If it says that ntfs-3g is an unknown type or gives a similar error message, install it by:
$ sudo apt-get install ntfs-3g
Now the device is mounted. However we want RPi to mount it automatically every time it boots up. For this you need to edit the ‘fstab’ file and enter the details of your device.
To edit the file use:
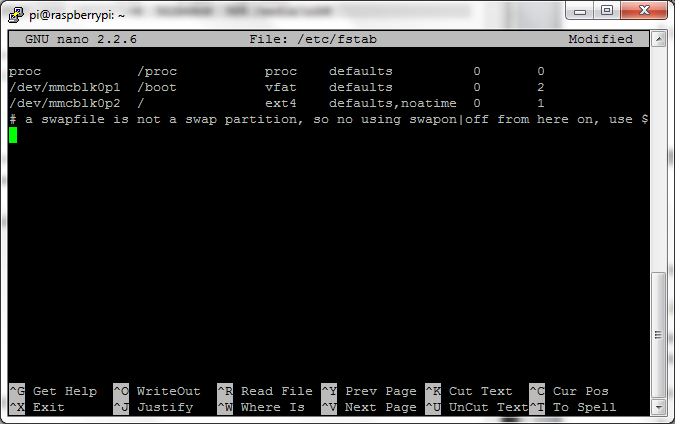
$ sudo nano /etc/fstab
It will bring up the file which contains a table as follows:
Enter the following record at the end of the table:
/dev/sda1 /media/downloads ntfs-3g defaults 0 0
Save and exit.
This is an excellent reference on this matter.
Now your external storage is ready.
Installing and configuring Transmission
$ sudo apt-get install transmission-daemon
We need to do some configurations. For this we nead to stop the daemon and edit the settings file.
Stop the daemon using:
$ sudo service transmission-daemons stop
Bring up the settings file by:
$ sudo nano /etc/transmission-daemon/settings.json
Set the download directory to your external device that was mounted:
"download-dir": "/media/downloads",
You can enable or disable RPC Authentication. If you enabled it you can set the username and password here as well. (The plain text password entered will be changed to the hash value and stored when transmission starts up).
By default, transmission only allows a white listed set of IPs to access it. You can either enter your IPs to the whitelist or disable this.
Save and exit the settings file and start the daemon:
$ sudo service transmission-daemons start
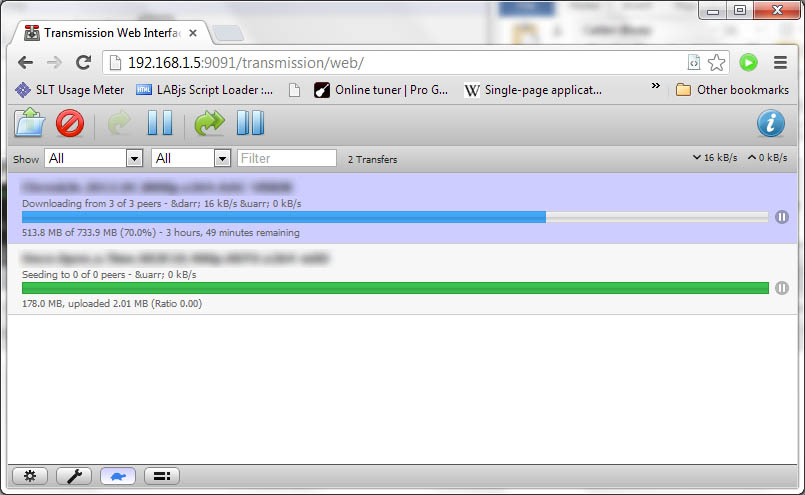
Now open up your web browser and point to the transmission url. It should be of the format:
rpi_ip:9091/
Ex: 192.168.1.5:9091/
You can now upload your torrent files and let the RPi download it!
I have noticed that sometimes an error occurs: “Error: Input/output error” To fix this re boot the RPi and ‘Verify local data’ of the torrent. This of course is not a permanent fix. I have tried the fixes here: http://stevenhickson.blogspot.com/2012/10/fixing-raspberry-pi-crashes.html and I’m still looking in to this issue.
Update: I’ve applied the fixes on the above link and reduced the number of peers in transmission. But apparently the main reason for the IO errors were with my Transcend flash drive. I tried with another (unbranded cheep) flash drive, and things are now working like a charm 
Update 2: I am using a SATA hard disk to store the downloads.
Accessing Downloaded Files
You can setup a Samba server on RPi to access your downloaded files from other machines. This article provides a comprehensive guide on how to set this up.
Additional References:
http://stevenhickson.blogspot.com/2012/10/using-raspberry-pi-as-web-server-media.html
http://cumulativeparadigms.wordpress.com/2012/08/13/tutorial-1-setting-up-rpi-as-a-torrent-server/


Good shit dude….
Cool idea, been thinking of setting something similar up myself.
Do you know if it is possible to configure it to work with a VPN system such as BT guard?
Hi, thank you for checking out the article.
Unfortunately I don’t have experience in using a VPN system on RPi. Probably this (http://www.raspberrypi.org/phpBB3/viewtopic.php?t=9644) will help.
Great tutorial! However, I have a few problems…
I have transmission installed on my Pi, along with XBMC and the Transmission manager application. I planned to have a BTBox/Media server with it. However, I simply can’t connect. All my settings are correct, and my username and password are correct, but everytime I try I get “Could not connect to Trasnmission. Open settings dialogue?”. Any help?
Hi,
Looks like it is a connection issue with the Transmission-XBMC plugin. Did you see this: https://github.com/correl/Transmission-XBMC/issues/4
Assuming I set up my RPi as a torrentbox, would u be able to access the files on my chromebook?
Hi Sean,
The above link I provided is to set up Samba server. But looks like there is no direct (easy) way to access shared networked hard drives from chrome book.
Have a look at this thread: https://groups.google.com/forum/#!topic/chromebook-central/VrYwSNH9i1w
Would it be possible to encrypt the external hard drive before you mount it?
[…] far I have been using flash drives to store data from my RPi Torrent box. But the flash drives get filled up quickly, and one of my cheap flash drives stopped working after […]
i get the same error “Error: Input/output error”
Hi David,
Most probably the flash drive is using more current. Try using another flash drive, or use a powered hard disk. This is my latest setup and it is working great: http://cyberasylum.janithw.com/connecting-a-sata-hard-disk-to-raspberry-pi/
yeah.I also think that is a current issue
i using a powered hard disk, but still error
are you using usb2.0 cable ?
Yeah. I use a USB 2.0 cable.
i use usb 3.0,maybe my hard drive box has problem.
you don’t sleep?
Probably. I think you can find more information by looking at the logs like mentioned here: http://stevenhickson.blogspot.com/2012/10/fixing-raspberry-pi-crashes.html
I’m in Sri Lanka. Its morning over here
out of curiosity what your raspberrypi current uptime?
Hi
Good share.
I consider the most stable iptv are those from Fishbone IPTV cloud
I would like to see more posts like this
Thanks