Connecting a SATA Hard Disk to Raspberry Pi

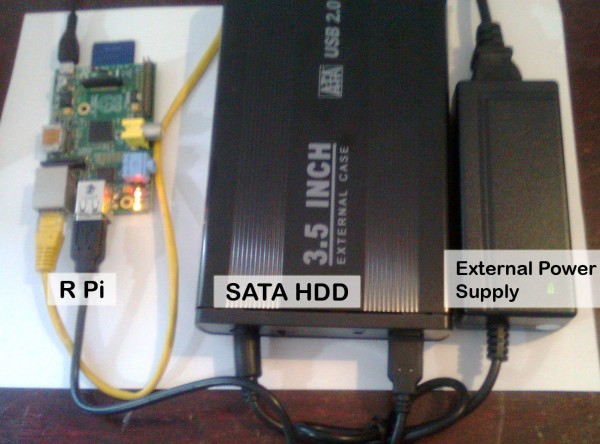
So far I have been using flash drives to store data from my RPi Torrent box. But the flash drives get filled up quickly, and one of my cheap flash drives stopped working after some time (Probably due to the large amount of writes issued when downloading torrents). I always wanted to have my files stored on a central location so they can be accessed by any machine on the network. So I hooked up a hard disk to the RPi. The RPi will not provide enough power for a normal external hard drive to operate, and therefore I used a SATA hard disk, and fixed it in to a hard disk enclosure which provides a SATA to USB interface, and provides the required power externally.


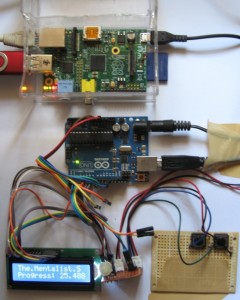
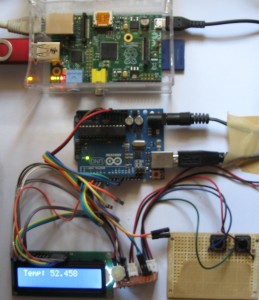
LCD Displaying system temperature    LCD Displaying torrent status

I previously had posted on how to communicate with an Arduino and display messages on an LCD using python. And I’ve been working on Raspberry Pi as well, setting it as a torrent box.

So I thought of hooking up these two together so that the LCD can display the torrent status. I also added two buttons so that I can scroll through the list of torrents. The Arduino is connected to the RPi via the USB, and the Arduino is powered by an external AV adapter. Initially I thought this will be unsafe, but apparently it is safe to do so (http://arduino.cc/forum/index.php/topic,22132.0.html, http://aeroquad.com/archive/index.php/t-1911.html?s=5273633e6fd3970524bf4473996b9f7d) The LCD also displays the current system temperature.

The source code the the python program and the Arduino can be accessed at: https://github.com/slayerjay/RaspberryPi_Arduino

Other Resources:

http://www.hobbytronics.co.uk/raspberry-pi-serial-port

http://www.raspberrypi.org/phpBB3/viewtopic.php?f=32&t=6832

http://raspberrypi.stackexchange.com/questions/357/how-do-i-monitor-and-or-control-the-temperature-of-the-soc

So you may have your RPi  set up as a torrent box, or a web-server  or you may want to login to it remotely out of your home network, and your ISP will be giving you a dynamic IP. This is where Dynamic DNS (DDNS) comes to the rescue. I used noip.com as my DDNS provider (which is free), but you are can use any other similar service.

The Theory

Your home network’s public IP changes time to time because it is assigned dynamically by your ISP. A DDNS service points to your public IP, and changes its records about your public IP whenever it changes. You will have to download and run a small client program that will report you IP to the DDNS service when it changes. So whenever someone accesses your domain address he/she will be pointed to your IP.

Setting Up

The different services that you are running on the RPi will be listening on different ports. The web server by default would be listening on port 80, and transmission torrent service will be listening on port 9091 (by default). You need to tell your router that any incoming packets that are coming for a specific port, (say port 80) should be forwarded to your RPi.Now the exact way to set up port forwarding depends on your router, but it is pretty straightforward if you know the above theory behind port forwarding. You can get some help from portforward.comIf port forwarding is set up you can check it using port scanner. And you will be able to access your service by your public IP.

  • Register with your DDNS provider, get a domain name, and download their client program.

I registered with noip.com and downloaded their Linux client software, and installed it (where you will have to enter your noip.com credentials)

  • Set the client program to run at startup of RPi

The following post explains how to set the noip2 client to run at startup: http://www.stuffaboutcode.com/2012/06/raspberry-pi-run-program-at-start-up.html

If all works well, you will be able to access the services on your RPi from anywhere!

I didn’t want to keep my laptop or the computer switched on 24/7 to download torrents. So downloading my torrents was the first task I wanted my Raspberry Pi to do. The torrents will be downloaded to an external hard disk or a pen drive. Transmission provides a web UI which makes it easier to remotely add and monitor downloads. As for initial preparations, the RPi has a static IP and SSH was enabled. You might want to look at my previous post on initial setting up stuff.

Preparing and Mounting the External Storage

I used one of my pen drives that is formatted as an NTFS file system. Connect the external storage to the RPi. Open a SSH session and type:

$ sudo fdisk –l

This lists all the hard drives that are connected and you will be able to find your external storage.

fdisk

Note the ‘Device Boot’ record (Mine is ‘/dev/sda1′ ).

Now let’s mound the drive. All mounted drives are accessed though /media/ folder.

$ cd /media/
$ sudo mkdir downloads
$ sudo mount –t ntfs-3g /dev/sda1 /media/downloads

If it says that ntfs-3g is an unknown type or gives a similar error message, install it by:

$  sudo apt-get install ntfs-3g

Now the device is mounted. However we want RPi to mount it automatically every time it boots up. For this you need to edit the ‘fstab’ file and enter the details of your device.

To edit the file use:

$ sudo nano /etc/fstab

It will bring up the file which contains a table as follows:
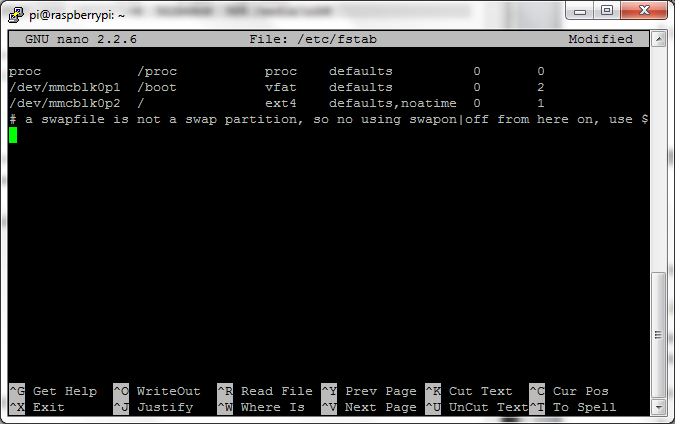
fstab

Enter the following record at the end of the table:

/dev/sda1       /media/downloads        ntfs-3g defaults        0       0

Save and exit.

This is an excellent reference on this matter.

Now your external storage is ready.

Installing and configuring Transmission

$ sudo apt-get install transmission-daemon

We need to do some configurations. For this we nead to stop the daemon and edit the settings file.

Stop the daemon using:

$ sudo service transmission-daemons stop

Bring up the settings file by:

$ sudo nano /etc/transmission-daemon/settings.json

Set the download directory to your external device that was mounted:

"download-dir": "/media/downloads",

You can enable or disable RPC Authentication. If you enabled it you can set the username and password here as well. (The plain text password entered will be changed to the hash value and stored when transmission starts up).

By default, transmission only allows a white listed set of IPs to access it. You can either enter your IPs to the whitelist or disable this.

Save and exit the settings file and start the daemon:

$ sudo service transmission-daemons start

Now open up your web browser and point to the transmission url. It should be of the format:

rpi_ip:9091/
Ex: 192.168.1.5:9091/

You can now upload your torrent files and let the RPi download it!
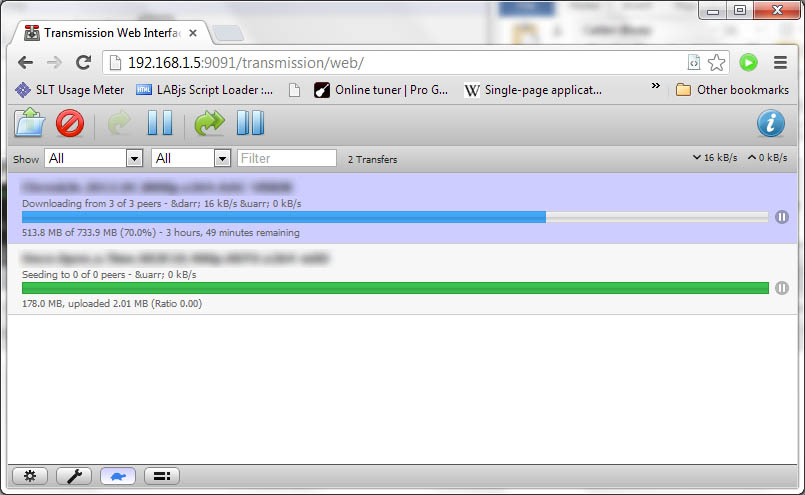
Transmission Web UI

I have noticed that sometimes an error occurs: “Error: Input/output error” To fix this re boot the RPi and ‘Verify local data’ of the torrent. This of course is not a permanent fix. I have tried the fixes here: http://stevenhickson.blogspot.com/2012/10/fixing-raspberry-pi-crashes.html and I’m still looking in to this issue.

Update: I’ve applied the fixes on the above link and reduced the number of peers in transmission. But apparently the main reason for the IO errors were with my Transcend flash drive. I tried with another (unbranded cheep) flash drive, and things are now working like a charm :)

Update 2: I am using a SATA hard disk to store the downloads.

Accessing Downloaded Files

You can setup a Samba server on RPi to access your downloaded files from other machines. This article provides a comprehensive guide on how to set this up.

Additional References: 

http://stevenhickson.blogspot.com/2012/10/using-raspberry-pi-as-web-server-media.html
http://cumulativeparadigms.wordpress.com/2012/08/13/tutorial-1-setting-up-rpi-as-a-torrent-server/
So I got my RaspberryPi today, and would like to share my RaspberryPi setup plan. These are some steps that you can use to kick start your RaspberryPi journey!

First Boot

Raspberry Pi’s Quick start guide explains the steps that are necessary for the first boot.

Setting up a static IP

You will most probably require a static IP to your RaspberryPi so you can access it over the network. To set up a static IP,  open up the terminal and enter:

$ sudo nano /etc/network/interfaces

This will allow you to edit the file. Change

iface eth0 inet dhcp

to

iface eth0 inet static

Below it, enter the following lines

address YOUR_STATIC_IP
netmask 255.255.255.0
gateway 192.168.1.1

After entering these lines, save the file (Ctrl+O) and exit (Ctrl+X)

Then reboot by entering:

$ sudo reboot

To check your IP enter:

$ ifconfig eth0

Enabling Remote Desktop

You will probably need to remotely log in to your machine. I followed this post and successfully configured remote desktop: http://www.raspberrypiblog.com/2012/10/how-to-setup-remote-desktop-from.html

Changing the default password

It is always good to change the default password (‘raspberry’). To do this enter the following on the terminal:

$ passwd

Raspberry Pi is a 25$ (around 50$ with taxes and delivery charges to Sri Lanka) credit card sized computer running a Linux distribution. I was introduced to this cool, cheap computer sometime back, and it caught my interest. Just a few days back, I placed my order for a Pi and waiting for it to be delivered.

It is intended to be used as a cheap computer for kids to start learning, but it has been put to use in many other projects. It is low powered, and can be switched on 24/7, which means it’s ideal to run a small web server or a media server and do some automation tasks.

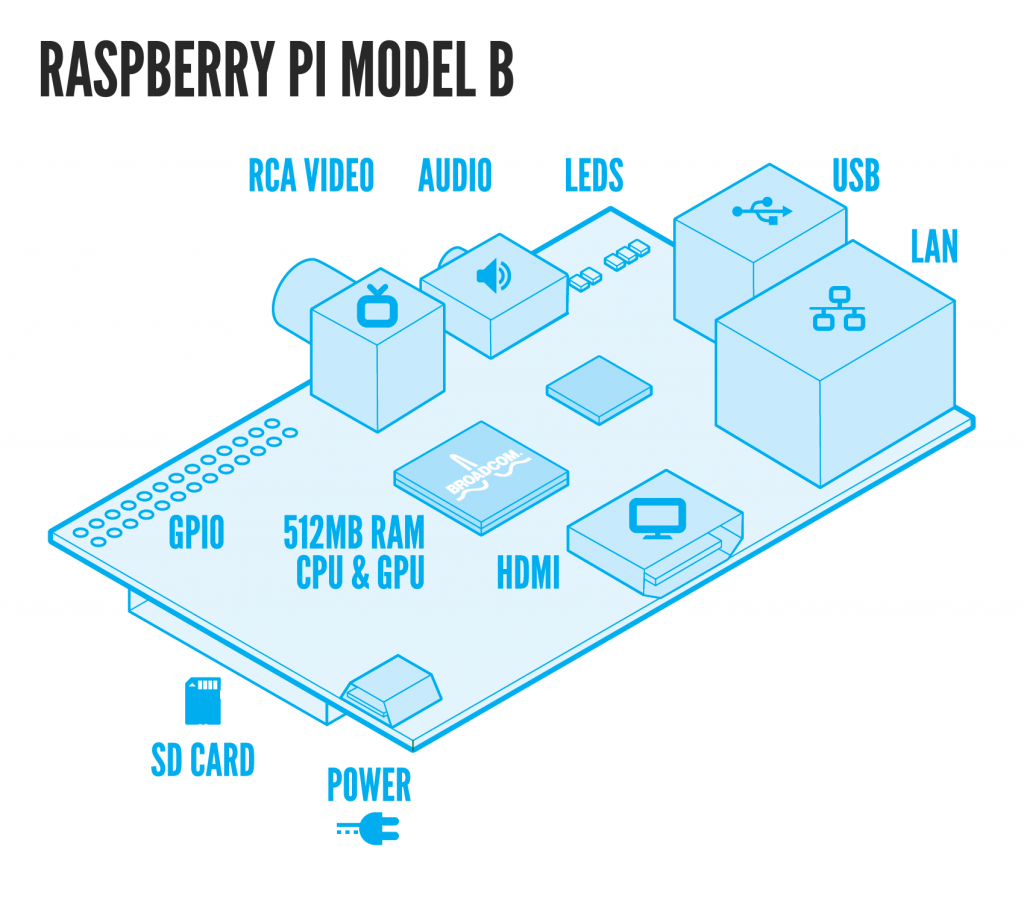
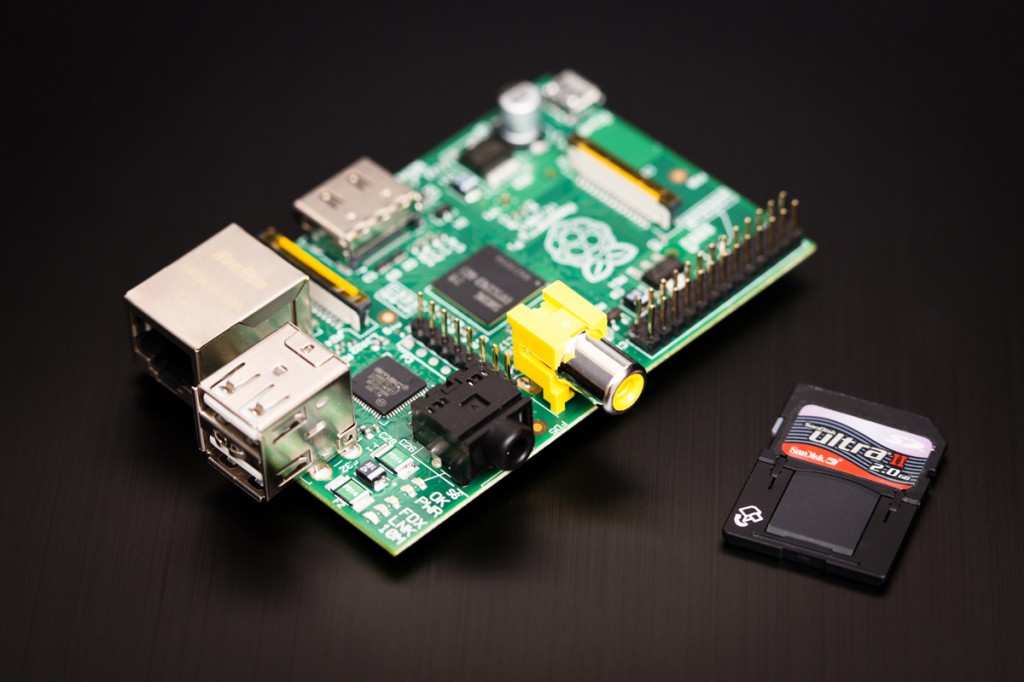
The current Model B comes with a 700MHz CPU, 512 RAM, 2 USB ports, HDMI and RCA video outs, and a 3.5mm audio out. It uses a SD/MMC for onboard storage. It has 8 GPIO (General Purpose Input/Output) pins, which means you can interface different devices such as relays and LCD displays and LEDs easily. It is pretty neat for a small computer that can run a linux OS.

There is an active community around the project and a lot of guides and projects. I hope to give RaspberryPi a shot and see what I can do with it!